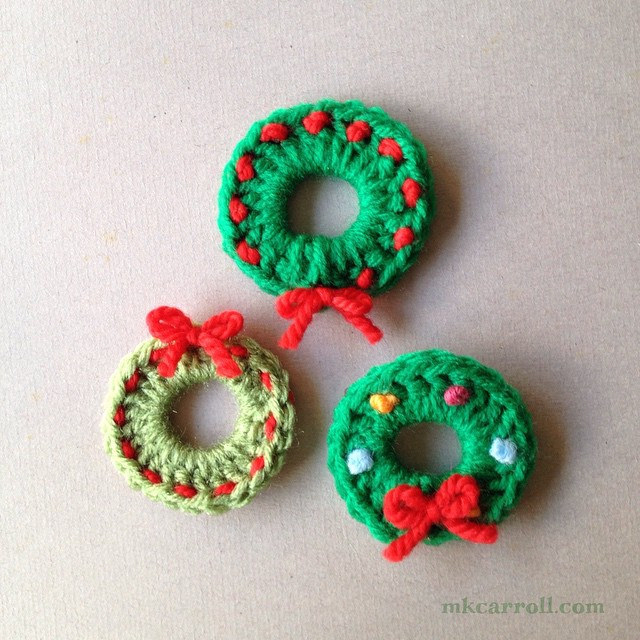
Recently, a friend of mine found a box of crocheted ornaments and pins that she thinks were made by friends of her mother. The wreath looked easy to figure out, and took less than 20 minutes from start to finish. In this case, I stuck to using materials I already had on hand.
I took photos as I went and hope to have a photo tutorial up within the next few days. For now, here's the written pattern:
Yarn: worsted weight (medium 4) yarn in the colors of your choice. Wreaths shown use Lion Brand Yarns Fun, color 130L Green (dark green) and Red Heart Super Saver, color Tea Leaf (light green). The accent colors are from various scraps in my stash. Lion Brand Yarn Bonbons Yarn mini-skein packs include some great choices for accent colors, including Jingle Bells (red, white, and green metallics and solids), Celebrate (assorted metallics) and Crayons (bright colors perfect for evoking strings of colorful lights).
Hook: US G/4.0 mm, or the size that will give you a fabric stiff enough to hold its shape.
Notions: tapestry needle for weaving in ends, 1 inch bar pins with clasp (if you want to make a pin), fabric glue for securing pins and decorations if you prefer not to sew.
Gauge: is not vital for this project. The finished piece is about 1 3/4" (4.5 cm) across.
Note: these instructions are written using US crochet terminology. UK/NZ/AUS crocheters, you will recognize the stitch used as treble crochet (tr) in your terminology.
Pattern: with green yarn, chain 12, join with slip stitch to form a ring. chain 3, double crochet 20 into ring. Note: if you work over the tail of the yarn as well, it will save you having to weave it in later. You may also have to pause and push the stiches back in order to fit all of the stitches on the ring. If you just can't fit all 20 stitches on, stop - the important thing is that the wreath is stiff enough to hold its shape. Finish with a slip stitch to top of the chain 3 from the beginning of the round. Cut yarn and pull through. Weave in ends.
Decorate as desired (I'll share a few tips in the upcoming photo tutorial). If you know how to embroider, French knots are perfect for making tiny "lights". A simple running stitch around the inside of the edge, finished with a tiny bow, is a quick and classic look! Craft stores carry lots of tiny decorations, like mini pom-poms, ornament beads, and ribbon bows, if you want to get a little fancier.